
The Truth About My Rib Failures |
I’ll admit it: my first attempt at home-style ribs was a disaster of biblical proportions. I tried to emulate a backyard pitmaster with a cheap oven and a lot of optimism, only to produce something with the textural consistency of a rubber tire. I spent four hours praying to the gods of barbecue, but I ignored the most basic rule of connective tissue, resulting in a meal that required a steak knife and a lot of jaw strength.
Thankfully, the Ninja Foodi changed my life to the magic of pressure cooking combined with an air crisp finish. This method is absolutely perfect for those humid, late-summer afternoons when it is far too sticky to stand over a hot grill for six hours. Now, I can achieve that coveted ‘fall-off-the-bone’ result while sitting comfortably in the air conditioning with a cold drink in my hand.
- ●Dramatic reduction in cooking time compared to traditional smoking.
- ●Consistent tenderness every single time thanks to the pressure seal.
- ●The Air Crisp function creates a professional, caramelized crust.
- ●Minimal cleanup since the meat and glaze happen in one vessel.
- ●Accessible ingredients that you likely already have in your pantry.
Essential Ingredients |
Ba: These are technically the ribs from the upper part of the ribcage, and they are leaner than spares. They provide the perfect canvas for the sauce and cook evenly in the pressure cooker.
Brown Sugar: This substance is actually just sucrose with a bit of molasses, which gives it a distinct depth. It acts as the primary caramelization agent for that sticky, dark glaze.
Paprika: Derived from dried and ground capsicums, this spice provides a vivid red hue. It adds an earthy, smoky undertone that tricks your brain into thinking these were cooked over charcoal.
Garlic Powder: Dehydrated garlic is more concentrated than the fresh version. It permeates the meat deeply under pressure without burning as easily during the air-frying phase.
Your Favorite BBQ Sauce: This is a complex emulsion of vinegar, sugar, and spices. It provides the final hit of acidity and sweetness to balance the rich fat of the pork.
 Let’s Make it Together |
- To ensure the seasoning adheres to the meat, pat the ribs completely dry with paper towels before applying the rub.
- Because we want a deep flavor profile, generously coat the ribs in the brown sugar, paprika, and garlic mixture, rubbing it into every crevice.
- To prevent the meat from sticking to the bottom of the pot, add one cup of water or apple juice to the inner pot before adding the ribs.
- Since we need to break down the tough collagen, seal the lid and pressure cook on High for 25 minutes with a natural release for 10 minutes.
- To achieve that professional charred look, switch to the Air Crisp function at 400°F and brush the ribs liberally with BBQ sauce.
- Your pan should be checked every 5 minutes during the final stage; air fry for about 7-10 minutes total until the sauce bubbles and darkens.
Never skip the natural release phase or you risk the ribs toughening up instantly.
You’ll notice that the ribs look pale after pressure cooking; this is normal before the air crisp step.
Avoid using a sauce with too much honey as it burns faster than tomato-based glazes.
Trust your nose here; if the sugar starts smelling like burnt toast, lower the temperature immediately.
Always remove the silver skin membrane from the back of the ribs for a better texture.
Perfecting the Cooking Process |
The science of the perfect rib lies in the transition from collagen to gelatin. pressure cooker at 15 psi, we force moisture into the muscle fibers, breaking down the tough connective tissues that usually take hours in a smoker. A cook time of 25 minutes is the sweet spot for ba, ensuring they are tender but not completely disintegrated.
Once the pressure stage is complete, the Air Crisp phase is all about the Maillard reaction. This is the chemical reaction between amino acids and reducing sugars that gives browned food its distinctive flavor. glazed ribs with 400°F air, we rapidly evaporate the water in the sauce, leaving behind a concentrated, sticky lacquer.
Timing the glaze is critical. Applying the sauce too early in the process leads to a burnt exterior and raw interior. only during the final 10 minutes, you protect the sugars from scorching while still achieving a deep, mahogany color that looks like it came from a professional smokehouse.
Add Your Touch |
If you enjoy a bit of a kick, try swapping the standard brown sugar for a mixture of maple syrup and cayenne pepper. This creates a sweet-heat dynamic that cuts through the richness of the pork and adds a sophisticated layer of complexity.
For a tangier experience, brush the ribs with a cider vinegar reduction before adding the BBQ sauce. This mimics the style of North Carolina BBQ and provides a bright, acidic contrast that makes the meat taste lighter.
Storing & Reheating |
To keep the ribs moist, store them in an airtight container with a splash of apple juice or a bit of extra sauce. This prevents the meat from drying out in the fridge, where they can stay for up to four days.
When reheating, avoid the microwave as it makes the fat rubbery. Instead, wrap the ribs in foil and warm them in the oven at 300°F, or use the Air Crisp function at 350°F for 5 minutes to regain that original crust.
1Use a meat thermometer to ensure the internal temperature hits 195-205°F for maximum tenderness.
2Slice the ribs into individual portions before glazing for a higher surface-area-to-sauce ratio.
3Add a drop of liquid smoke to the pressure cooking water to simulate an authentic pit flavor.
4Rest the meat for 10 minutes after the air crisp phase to allow the juices to redistribute.
5Always use a high-smoke-point oil on the rack if you find the ribs are sticking during the crisp phase.
FAQ |
- ●Q: Can I use spare ribs instead of ba?A: Yes, you can, but you must increase the pressure cooking time by about 10 to 15 minutes. Spare ribs are meatier and have more connective tissue than baby backs, so they require a longer window under pressure to reach that tender, fall-off-the-bone consistency.
- ●Q: Why do my ribs come out dry?A: This usually happens if you overcook them during the Air Crisp phase or use a quick pressure release. Quick releasing can cause the moisture to violently exit the meat, while over-air-frying evaporates the internal juices, leaving you with a dry result.
- ●Q: Do I really need to remove the membrane?A: Absolutely. The silver skin membrane is a tough, inedible layer of connective tissue that prevents the rub from penetrating the meat. Removing it ensures your seasonings actually reach the pork and prevents the ribs from shrinking awkwardly during cooking.
- ●Q: What is the best liquid to use for the pressure cooking phase?A: While water works, apple juice or a mix of apple cider vinegar and water is superior. These liquids introduce a subtle acidity and sweetness that penetrates the meat, enhancing the overall flavor profile and helping to tenderize the fibers.
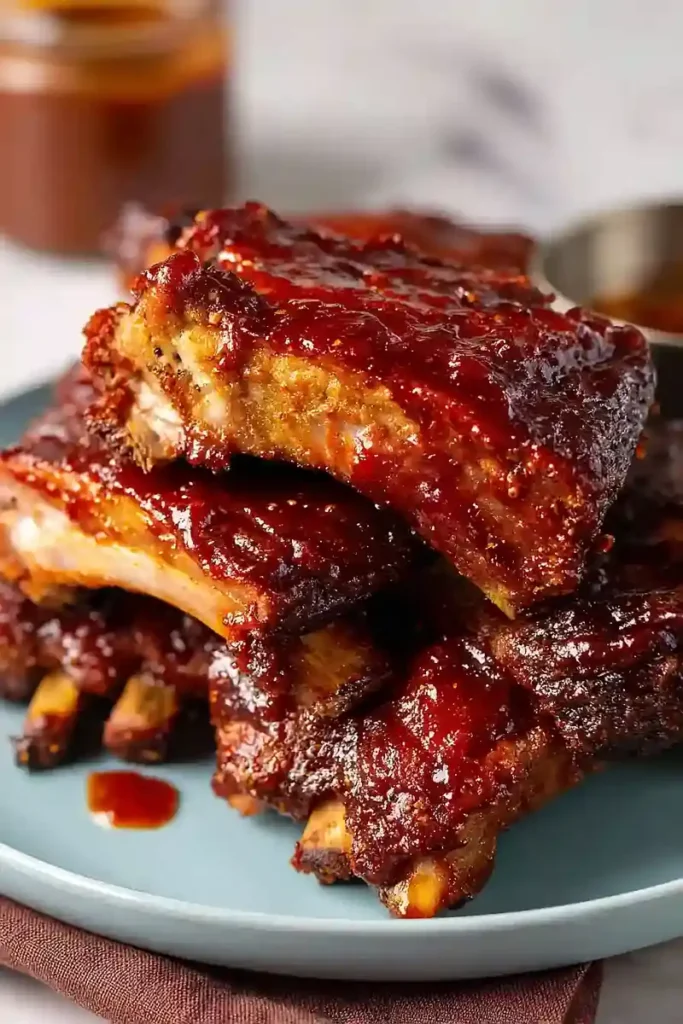
Foolproof Simple Ninja Foodi BBQ Ribs
Tender, caramelized BBQ ribs made using the Ninja Foodi’s pressure cook and air crisp functions for a perfect balance of tenderness and char.
- Prep Time: 15 minutes
- Cook Time: 45 minutes
- Total Time: 1 hour
- Yield: 4 servings 1x
- Category: Dinner
- Method: Pressure Cooking & Air Frying
- Cuisine: American
Ingredients
- 1 rack Baby Back Ribs
- 1/4 cup Brown Sugar
- 1 tbsp Paprika
- 1 tsp Garlic Powder
- 1 cup Water or Apple Juice
- 1 cup Favorite BBQ Sauce
Instructions
- Pat ribs dry and rub with brown sugar, paprika, and garlic powder.
- Add 1 cup of water or apple juice to the Ninja Foodi inner pot.
- Place ribs in the pot and pressure cook on High for 25 minutes.
- Allow a natural pressure release for 10 minutes before opening the lid.
- Switch to Air Crisp mode at 400°F and brush ribs with BBQ sauce.
- Air fry for 7-10 minutes until glaze is bubbly and caramelized.